


Finally a Christmas Frame

Okay so have been a little crazy for me and my house over the last month or so. Lots of changes and stresses....but I think we are on the road to improvement and things might just get a tad bit worse before they get better but there is, at least, some light at the end of the tunnel. Thank Goodness....! I think because of it all the creative mojo has left me so I'm trying to settle in and start pulling it back together. Sorry I haven't posted in a while.......hoping to change that here soon! Holidays are coming and I have lots of okay ideas but none that really excite me. So I'm still looking for inspiration. LOL Hang in there though....I will be back at it soon enough.
Flower Wreath

Decorating......


Score board flower

FOREVER YOUNG cartridge

Princess Birthday Card

Paper Flowers

Here It Is.... 6x6 mini Album Tutorial
Upcoming Tutorial


Birthday Balloon

Pizza Card


Smash Book start...

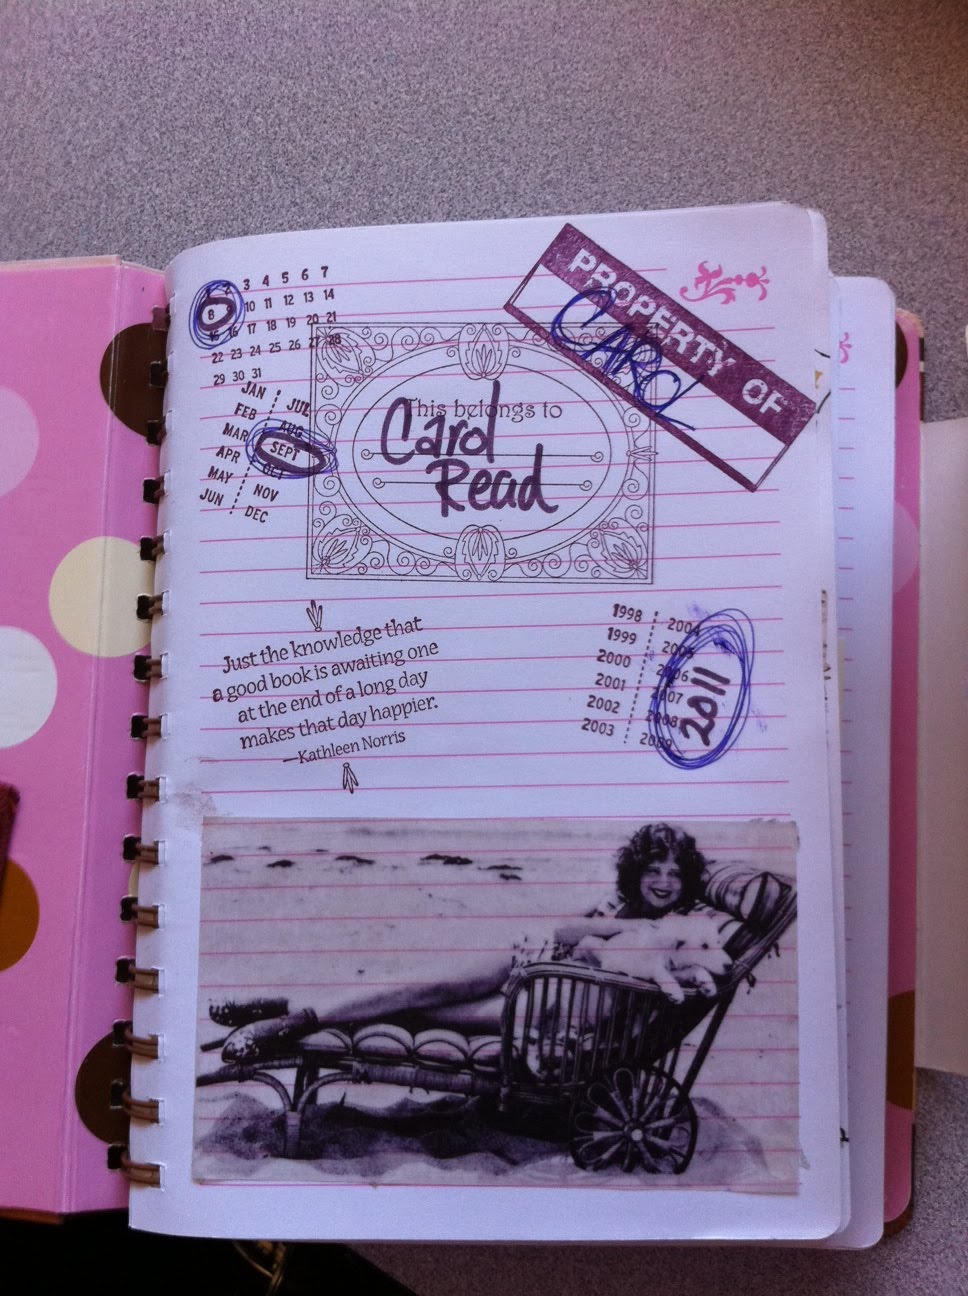


So what do you know about Smash Books?? Fairly new trend, I have to laugh because I started something similar to this once. It's kind of like a journal but more artsy or whimsical. you add a lot of outside elements like receipts and ticket stubs...photos, notes, jotted down, thoughts and napkins, matchbooks, lists like daily to do's or plans, sketch ideas, goals, various memorabilia from special events. I plan to get some Blinkies to some sites for Smash books so stay tuned for those.(that way you can get ideas for design your own). Not sure how much I'll share of mine maybe more at a distance. I think of them as being somewhat personal...at least I know that's my plan for mine.My challenge more myself is to actually finish it from start to finish lol Not a strong point for me so yes a true challenge. LOLSo get a book they have actual smash books...or a spiral or three ring small binder and let the creativity flow. Let me know if you decide to try it out and share comments of what you think of the idea.

Vinyl models on the wall..


Fall scrap page


The Puff Box I received ......


GREAT TIP..................
Okay so the more you use your cricut the more you go through your mats. Mats are expensive. $12.99 for two 12x12s. So I went searching online to see what people were doing about this, and I found out everyone is reconditioning their mats. No way, does this really work? I found several different ways of doing it and they were all basically the same idea. Some cleaned their old mats first some didn't. Some used spray glue products.....most used Zig two way chisel tipped jumbo glue pen. Okay so something here has to work right? But my thought was is it going to stay sticky for long? Is it going to be too sticky and ruin my paper?? Yikes it was scary to me. LOL BUT....I was running out of good mats and running plentiful on old yucky non sticky mats. So I took the plunge. The following is what I did.............and it work beautifully! I was shocked at how well it work!
You will need....
Rubbing Alcohol... what maybe a $1.00 at your local grocery or Pharm
a scraper......I used a small metal spatula from my kitchen that never gets used otherwise LOL Online most were using their scraper from the cricut tool kits.
a towel
and a ZIG two-way big chisel tipped glue pen UPC # 015586476019 $6.49 or something like that at my store. (Michaels)
I poured about two tablespoons of alcohol on my yucky mat and slowly spread it around with the spatula. Just let it get the whole mat wet and soak in for about 3-5 min. Then with my scraper/spatula I began scraping off all the old adhesive residue from the mat. (took about 3-5 mins to get it all scraped loose. made a pile in the middle of the mat and then scraped it into trash when it was all done. I then ...after making sure I had a clean mat with no glue boogers on it....rinsed it with water and dried it thoroughly.
So now I have a clean smooth dry mat. With the Zig pen I started in one corner and ran the pen over the mat, being sure to cover ever inch of it with the pen. Careful to not go into the green edges of the mat cause you don't want the glue to get on your rollers of your machine! Just a nice light layer of wet glue over the whole light colored part of your mat. Then let dry somewhere safe.....You don't want some one putting their fingers on it or a pet to jump up on it....(oh my could you imagine) LOL Anyway let it dry for a while. Online they said at least 30 min....I just did mine before I went to work and they were ready to go when I came home! You know that thing about a watched pot right????
So I get home and pull out the mat......hmmmmm idk....I'm skeptical......but I tried it out and OMG it worked great! I was afraid it was going to be too sticky or that my paper would curl and warp up but it didn't I wouldn't suggest using thin pattern paper right off the bat but.....it was BEAUTIFUL on card stock.
So for under $8.00 to get started you can recondition your cricut mats over and over for pennies a time! It's okay to be skeptical...............but TRY IT! You'll see!
Halloween Card

Just Because Cards

Halloween Card

Halloween Card


